Sunday, October 21, 2012

Pumpkin Pecan Cookies

Tis the season to cook with pumpkin! You know I have to admit in the past I have always thought pumpkin was similar to baby food, and even a slice pumpkin pie needed extra whipped topping just for me to consider eating it. However, if Rhianna can give Chris Brown a second chance I figured the least I could do is try some pumpkin again. I'm glad I did. I've discovered how versatile pumpkin can be, I also like to think of it as "flexible". Meaning...it is so moist you could forget you were baking pumpkin cookies one time and they still came out moist and chewy! Just last weekend I made pumpkin ice cream and a pumpkin turtle pie. The turtle pumpkin pie was perfect for people who might be getting bored by the much expected pumpkin pie, but it was still pumpkin pie-y enough to please the traditionalist at any gathering. ANYWAY, back to the cookies...they are easy to make, and if you are like me and somehow always have a can pumpkin in their cupboard all year round then you won't even need to go to the store to make these.


First take a can of pumpkin (its 100% pure, its orange, and it says libby's...we all know it too well) and put it into a sauce pan. This is the part where you get to be creative if you want. I like to simmer my pumpkin with some honey, maple syrup, sugar/cinnamon mix and ground cloves, but feel free to enhance your pumpkin in anyway you want. Let that simmer and then cool while you get your mixing bowls in order.


Preheat your oven to 350 degrees. In a medium bowl you'll combine the flour, baking soda, baking powder, cinnamon, nutmeg and salt.


Then in a larger bowl, beat together your stick of softened butter and both sugars. Then beat in your pumpkin mixture, egg and vanilla.


Next, gradually add your bowl of dry ingredients to your larger bowl. Once your ingredients are fully incorporated go ahead and set aside your beaters to be washed (you'll need them for the icing), and then you can stir in the last ingredient...the pecans.


Add little dollops of dough to a greased baking sheet and bake for 15-18 minutes.


While your cookies are baking you can go ahead and make your icing. My mom gave me this icing recipe when I was probably about 9 when she and I made a family favorite cake together. Truthfully, the first time I made these cookies I didn't ice them. They were delicious, but I'd have to call them a "brookie", a nice moist cookie so chewy it could almost be mistaken for bread. That's when I decided I needed to amp them up, and what better way than to top them with rich homemade icing? This icing recipe is so easy and comes out perfect literally every time! Let's just say if this icing was American, it would be in the 1%. So to make the icing you'll need a mixing bowl. In the bowl add a stick of softened butter, 8 oz of cream cheese (I like to get the whipped cream cheese because I feel like half the work is already done for me), 4 and a half cups powdered sugar and 1 teaspoon vanilla. Beat these ingredients together until well incorporated and then add to the tops of your cooled pumpkin cookies!


It doesn't get much better than these cookies, a perfect snack or after meal treat. I'm including a 4x6 recipe that you can print if you would like.


Monday, September 10, 2012

Zucchini Bruschetta

First and foremost I would like to thank my dear friends Natalie and Mary Kathryn for convincing me I was long over due for a blog post. Or in Natalie's case, bullying me into writing another blog. I do appreciate their encouragement. It feels good to be back.

I've made this dish a couple of times and I have to say its always a hit. Its not your typical tomato/mozzarella based bruschetta. It has a sweet and savory balance that goes so well on the lightly cream cheesed bread. There is a recipe at the end of this blog post if you want a copy for yourselves. Now, lets dive right in.

Here is what you'll need:


You'll dice up your veggies and cilantro and add them to a mixing bowl. I know cilantro might seem out of left field but I promise it brings a fresh crispness that you're mouth will thank you for. 


Then drizzle in the honey, olive oil and balsamic vinegar. Next shred both of your cheeses into the bowl. Then season with your favorite seasonings. I like a little garlic salt, pepper and kosher salt. 


Then you'll grill your bread and be sure to brush it with a little butter (everyone needs a little Paula Deen on their shoulder when they cook, right?). I like a simple baguette with this, but choosing a wider bread like french bread would work, I would just cut it thin so your pieces still feel like a finger food. 


Lastly you can spread a little cream cheese onto the grilled bread and add a spoonful of your bruschetta mix. Its the perfect party bite!


The mix of the sharp cheddar cheese with the tang of the red onion is perfect. Of course the balsamic vinegar flavor is powerful but it balances well with honey and the cream cheese spread. I love this dish because I can make the bruschetta in advance and just grill my bread before a get together. I think my favorite part about serving this is people will bite into it and not know what quality is making it so good...I think the secret is in the honey. 

Upcoming recipes are pumpkin pecan cookies, swiss and feta dip and refried bean dip. Lets get cooking!


Monday, February 13, 2012

From Rava to Linda.

A blog about a car? Thats nonsense! But after 11 years 6 months and 17 days I have parted ways with my Toyota rav 4, also known as the "rava". Its been definitely been full of great memories, countless oil changes and numerous mounting problems. Though, when approaching my third winter without heat I finally said somethings gotta give.
So after years of saving, planning and researching I finally decided on a Mazda cx7. I know it seems silly to say goodbye to a car, but when it has seen so many states, so many miles and of course so many memories I had to honor it with a post.


I love my new car! It took some getting used to, for a while I didn't even feel like it was real. She became named Linda due to the talking GPS built in. I told Chuck on the way home from the dealership, "that woman sounds like a Linda", and its stuck ever since. For those of you who have had the glorious opportunity to take a ride in the late "rava" feel free to take your moment of silence whenever you see fit.


Talk to you soon!

Saturday, September 3, 2011

Fried Zucchini

Food..hmm....food makes the world go round, fried food? Now thats just from heaven.

I am a person who from time to time enjoys a good fried mozzarella stick. It's such a great appetizer or guilty snack. It lead me to start thinking of what else would be good breaded and fried? Zucchini! Now I did not invent fried zucchini by any means, but this is my take on how fried zucchini should be made.

First, I don't limit myself to just zucchini, I get his best friend in on the fun too, yellow squash. I cut up the zucchini and squash in to thin "chips". Use as many veggies as you want, I find that one of each makes a great snack for about 4-5 people.

So once you've got them cut up you can put a few at a time into your egg wash. My egg wash is just 3 eggs I whisked in a bowl.

From the egg wash grab one chip at a time and coat it with your breading. I used panko bread crumbs, shredded parmesan and a couple of my favorite seasons. If your shredded parmesan is coarse, you can put it into a food processor with your seasonings to get it finer.


Then once you've dredged your chip in the breading you can put it in to your pot of hot oil. Let cook about a minute on each side and then place it on a paper towel to cool. Its a crispy outside and a warm softer inside. You get the saltiness of the parmesan and the flavor of the seasoning with the crunchiness of your bread crumbs....YUM! Favorite dipping sauces are ranch and ketchup.


Hope you take the chance to enjoy some fried zucchini sometime soon. Feel free to print off the 4x6 recipe card. Talk to you soon friend.

Friday, August 26, 2011

A commonwealth cocktail, reinvented.

It's a Friday night and I opted to stay home and edit a wedding I shot last weekend rather than go out. Don't worry I am not alone, I have the London Gentleman to keep me company.

Let me explain...

I stumbled upon a classic British commonwealth cocktail recipe called the Dark & Stormy. Wanting to make it my "own" so I decided to recreate it...but do it Jenna style.

I have to be honest with you, when thinking of this cocktail in my head I thought it would be a drink that I would lightly sip on because it would be strong. But I have to tell you, its not too strong, its just right.

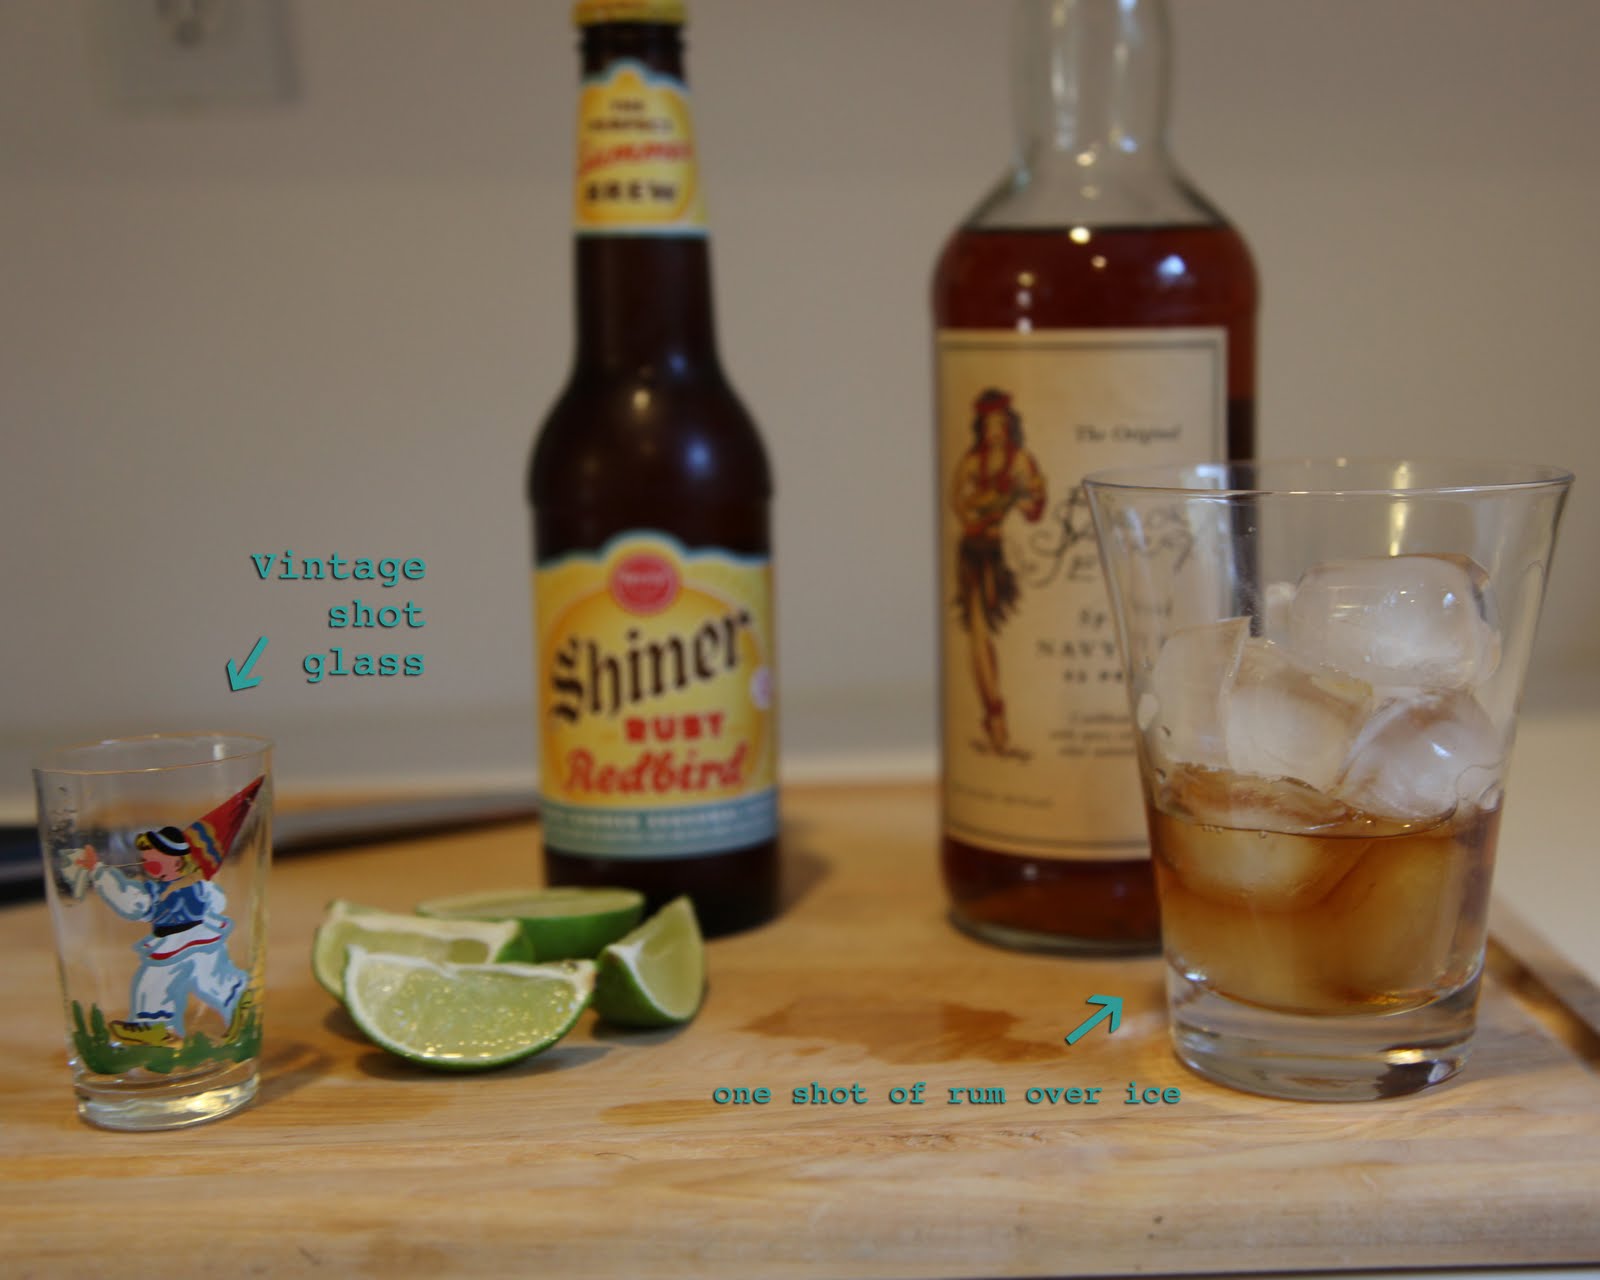
You will need dark rum, ginger flavor beer and a lime. Thats it, just 3 ingredients.

First you will add ice into a cocktail glass. Then you will add one shot of dark rum over ice.

Then you will pour your beer over the shot and ice.

Next you will zest some lime into your glass and add some juice of a lime from your wedge and then stick it on the rim of your glass.

The flavor is like a delicious beer with the crispness of a lime and the spicy warmth of rum, perfectly mixed together. For those of you 21 one and over pick up a six pack and try the London Gentleman. I have to give some credit to Blake for the name of the cocktail. He thinks adding gentleman to the end of any cocktail will class it up, and I think he is right.

Thursday, August 11, 2011

Getting Married

You know, I think M. Ward said it best: "hey, I ain't never met anyone like you before...I thought all the good ones were gone you're here to tell me I was wrong". Minutes after meeting Chuck I said to myself "just don't screw this up". Lucky for me, he was saying the same thing to himself. I could talk for hours about what a lucky girl I am, but who's got time for that? Instead, I wanted to take the opportunity to share some of my DIY side. While planning for my wedding and even after the wedding I was continually told that the "Jenna touches" were everyones favorite part. I think I let the flattery get to my head because here I am blogging about it.

Being on a budget helped to inspire a lot of my wedding decorations. I also hated the idea of spending SO much money on decorations/accessories that would only be used for one day. Thus, I was forced to think outside the box. Handmade items with recycled materials became my wedding theme. From the button boutonnières to the recycled table decorations and and making my own invitations, I found ways to cut cost. Speaking of invitations. I thought I'd share a few photos.


I used different shades of teals and blue greens for the back color paper.


Chuck insisted on the expensive glue sticks to make the process go faster. I let him win this battle, marriage is about compromise right?


The button boutonnieres and bridesmaids hair pieces were all made with vintage buttons. Though, the invitations used store bought buttons. I hot glued one to every invitation.


...and the finished product. There is something about making them myself that seemed satisfying. We used recycled paper bag envelopes to mail them in. If this bored you, don't worry, I think the next blog will be about food. I know everyone can relate to that. Talk to you soon, friend.